I created this guide because, as a photographer, it’s not easy to find a complete photography setup guide or photography tips online in 2026.
Most blogs don’t teach photography comprehensively in a single place. At best, they provide partial context.
And as you know, due to the numerous choices, beginners often struggle to determine what they actually need and how much they should spend.
It doesn’t matter if you are starting a photography profession or just as a hobby; a budget on how much you need to spend can help you get a setup without overspending.
In this article, we will discuss everything: budget, gear suggestions, and smart choices that offer you the best value for money.
No matter if you are a professional photographer or just see photography as a hobby, this guide is for everybody.
You can refer to this article if you want a full budget-friendly guide for the gear required or needed.
Why a Good Photography Setup Guide Matters? (Camera + Gear + Planning)
A quality setup is the first step for great pictures and a smooth learning experience for any photographer.
Photography is not just about the camera, but the most compatible and right gear that goes with the camera.
With the right gear, learning becomes a whole lot easier. Gear selection also plays a major role in picture quality.
There will be noticeable changes with the right camera and the supporting gear, such as lenses that go with it.
Along with the camera, planning gear is also important. It can help you understand what you want to capture, how, and what settings to use, etc.
If you have a well-planned photography setup, it can help you gain confidence in your work.
After you get familiar with your gear, you can try experimenting with it and move forward and progress in your work.
Still Confused? Check out our latest guide on Photography Equipment Checklist for Beginners: From ₹30K To ₹1.5L to find the equipment that suits your budget.
Photography Setup Guide to Choosing Your First Camera in India
The first camera is a big decision, and it can be overwhelming, but it can be made easier if you focus on practicality rather than perfection.
In India, content comes with a range of conditions, such as bright scenes, festivals, low-light events, etc.
So while choosing your first camera, you need to choose one that is consistent across all situations.
A camera should also have a dynamic range, reliable autofocus, and manual control that can help in the Indian environment.
DSLR vs Mirrorless vs Smartphone — Choosing the Right Camera Type
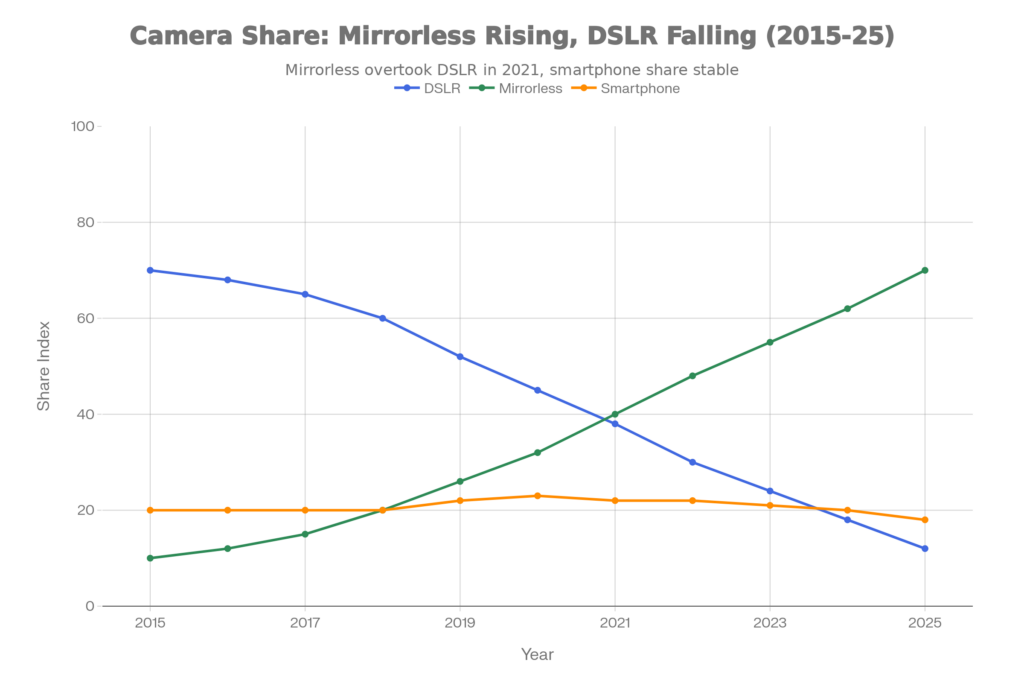
Now the first choice you need to make is the choice among DSLR, mirrorless, or smartphones.
DSLR is the most wanted option among beginners.
They can have excellent battery life, sturdy build, and DSLRs also come with a full range of budget-friendly lens options.
DSLRs can help beginners get a learning platform and understand photography fundamentals better and easily.
Mirrorless, on the other hand, is popular due to its compact size and modern features.
These cameras offer live previews, faster autofocus, and better video capturing.
The initial cost of the mirrorless camera may be a bit higher for beginners, but it can be convenient in daily life and daily use.
Smartphones are the most convenient and the most accessible option in today’s time.
Smartphones can be the best option for casual photography; today, smartphones also rely on software and automation.
But smartphones can limit the creative control and the learning opportunities for a photographer than a legit camera.
If you’re still confused about choosing your very first camera as a photographer, then check out our guide on Camera vs Smartphone Photography: Buyer’s Guide for India 2026 for an in-depth comparison and review.
Sensor, Budget & Versatility: What Works Best for Beginners in India
The best choice of sensors for the Indian beginners is an APS-C sensor.
This sensor creates a perfect balance for great images and with the quality and affordability.
It can handle low-light conditions very well and is available in both DSLR and mirrorless cameras as well.
You can experiment with various photography styles using these sensors.
Budget is also a factor that you need to focus on as a beginner.
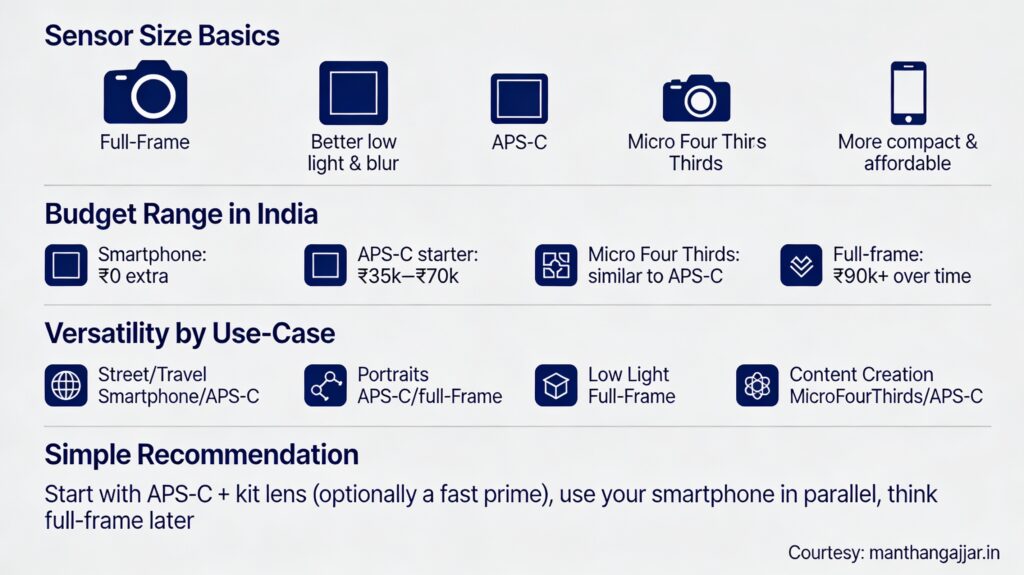
You need to include the lenses and essential accessories in your budget and plan accordingly, as these accessories can have an impact on the images.
Versatility is another factor that is crucial while choosing a camera, such as lenses that are affordable and compatible, resale value, etc.
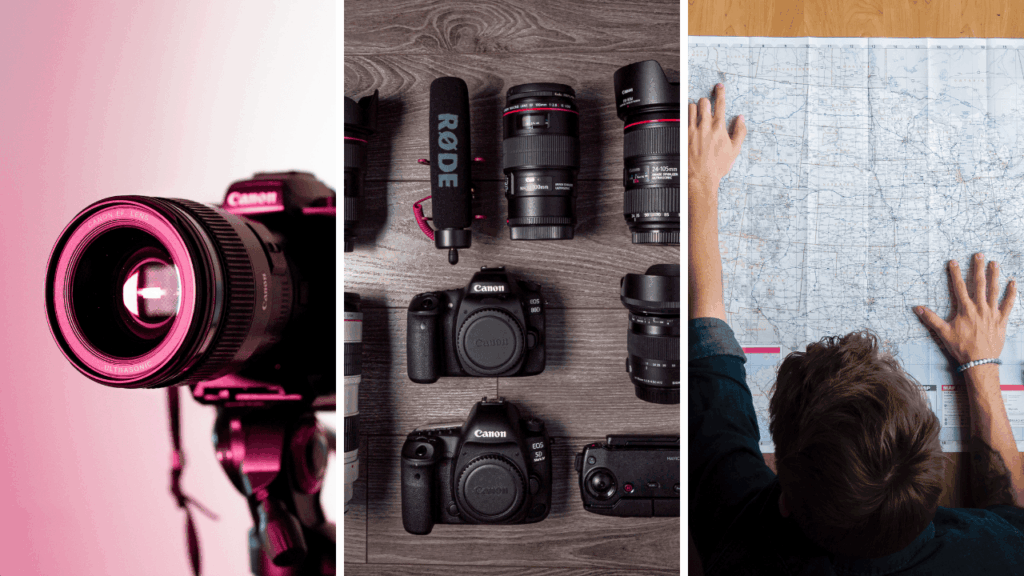
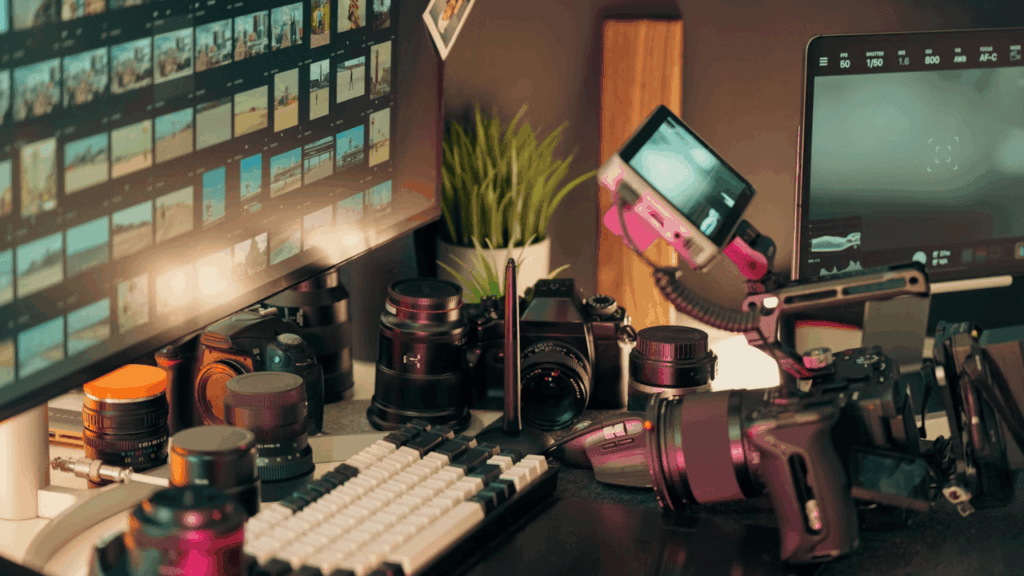
Must-Have Gear in a Beginner Photography Setup (Affordable to Mid-Range)
While starting with photography, it is not important to buy the most expensive or all the equipment right away.
You need to focus on the essentials and the affordable ones at that.
The gear you choose you should choose the one that helps you learn comfortably, practice, and shoot confidently.
In today’s time, with all the advancements in technology, there is a lot of budget-to-mid-range equipment that can help you experiment, learn the basics, and grow as a photographer.
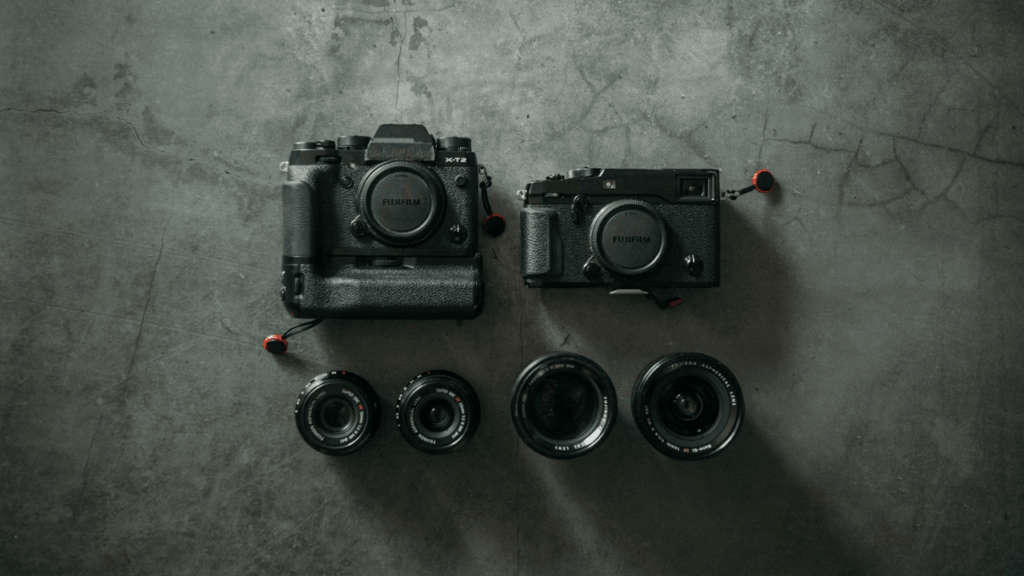
Camera Body and Lenses — Kit Lens, Prime, or Zoom?
The camera lens and the body are at the heart of photography.
The lens decides how you see the world. Now, most beginners start with a kit lens, which is typically 18-55mm.
You can shoot landscape, portrait, and gain knowledge on focal length along the way, and see how it affects your composition and work on it.
After the kit lens, you can move to the prime lens, such as the 35mm or 50mm.
The prime lenses are better for low-light conditions and even create a background separation.
And further down the lane, you can try your hand with the zoom lenses.
Zoom lenses work better for wildlife, sports, and travel photography.
If you want to learn the meaning and usecase of each camera lens then read our article on Understanding Camera Lens Types: Wide, Telephoto, Prime vs Zoom.
Memory Cards, Backup Batteries & Storage Essentials for Beginners
Storage is the thing that is most times overlooked, but it is also important for shooting in the best way possible.
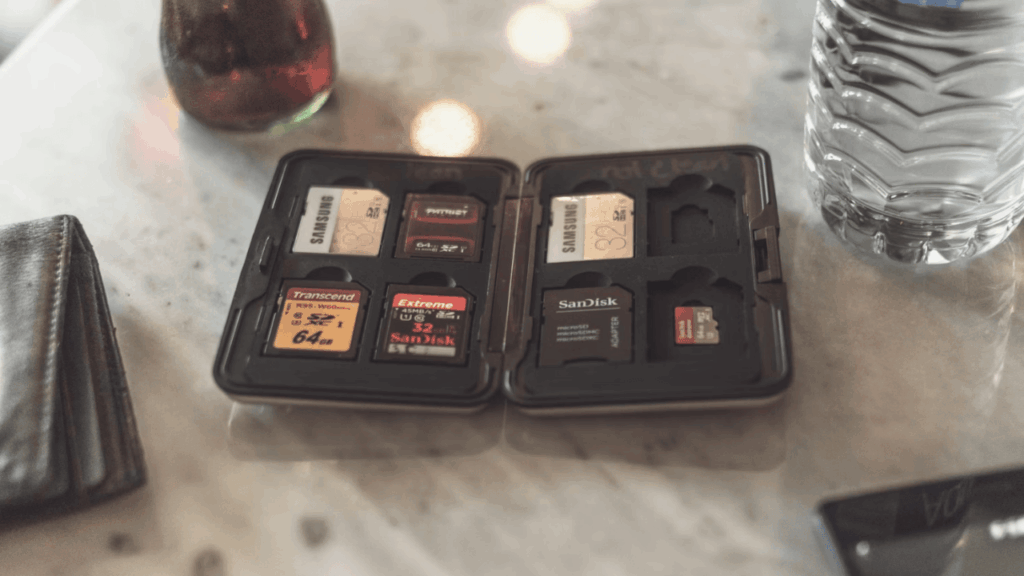
Storage and power are both important for uninterrupted and smooth shooting.
You should use high quality SD card so that you can avoid delays during continuous shoots and video recording.
You can also make a habit of carrying a spare battery every time, so you can avoid the hassle on long shoot days.
To ensure the safety of your work long-term, you can use an external hard drive or an SSD.
Even cloud storage can be a lot of help in keeping at least one copy of your work.
Tripods, Camera Bags & Protection Gear for Indian Conditions
A tripod is an important tool for any photographer, especially for beginners.
It can help you with sharp results and get the best image stabilization.
You can even experiment with various techniques, such as long exposures, and help in low light conditions, travel photography, videography, etc.
A good and properly padded camera bag can help protect your equipment, camera, and lenses during all the outdoor shoots and during travel as well.
Along with a camera bag, you can also invest in protective items for your camera, such as rain covers, lens cleaning kits, protective filters, etc.
All this protective gear can help your camera last longer and help avoid long-term damage.
This can reduce the maintenance costs significantly over time.
Lighting Setup Basics — Natural Light vs Flash for Beginners
Understanding light is one of the most important things that you need to learn.
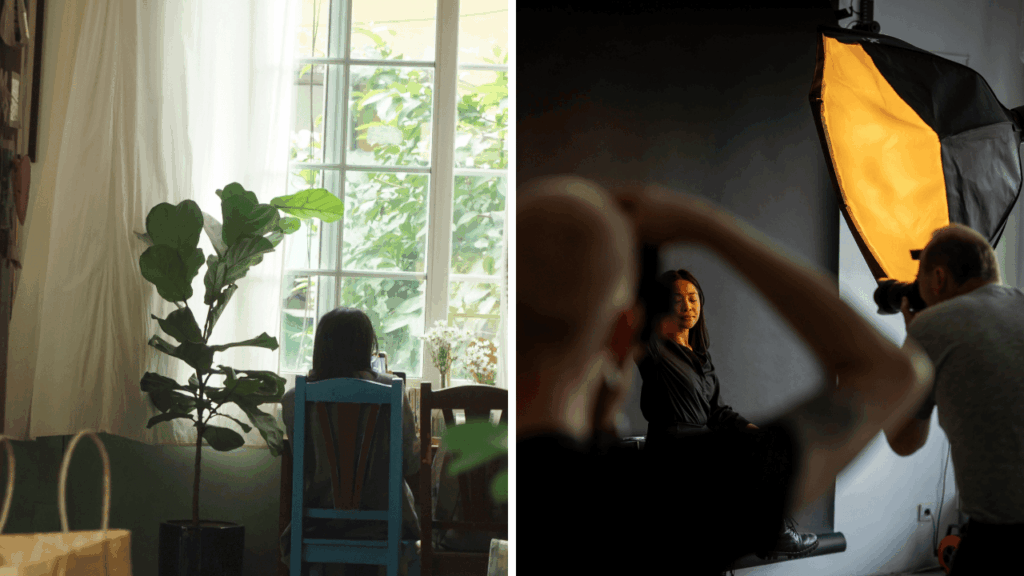
If you are a beginner photographer in India, you need to understand how sunlight behaves throughout the day.
Sunlight can also help you get a better understanding of exposure and mood.
You can use different situations, such as window light, shaded outdoor areas, golden hour, etc, for practice.
After practicing sufficiently with the natural light and understanding it better, you can move on to external flashes.
You can practice and improve the indoor shoots significantly with a soft light and, reflector.
Master Your Camera Settings & Photography Fundamentals
Understanding and mastering the camera settings should be your priority before you move on to advanced techniques and switch to advanced gear.
Once you master the core settings of your camera and understand how light, composition, and motion work in the camera, you will see an improvement in your work.
The fundamentals of a camera can ensure that you get the best possible results.
While exploring your camera’s basic settings, you can see how they work in different situations and what impact they have on your work.
This step is important, especially in India, as the weather can shift within minutes here, and by understanding the basics, you can adapt to situations and shoot confidently.
Understanding the Exposure Triangle: Aperture, Shutter Speed & ISO
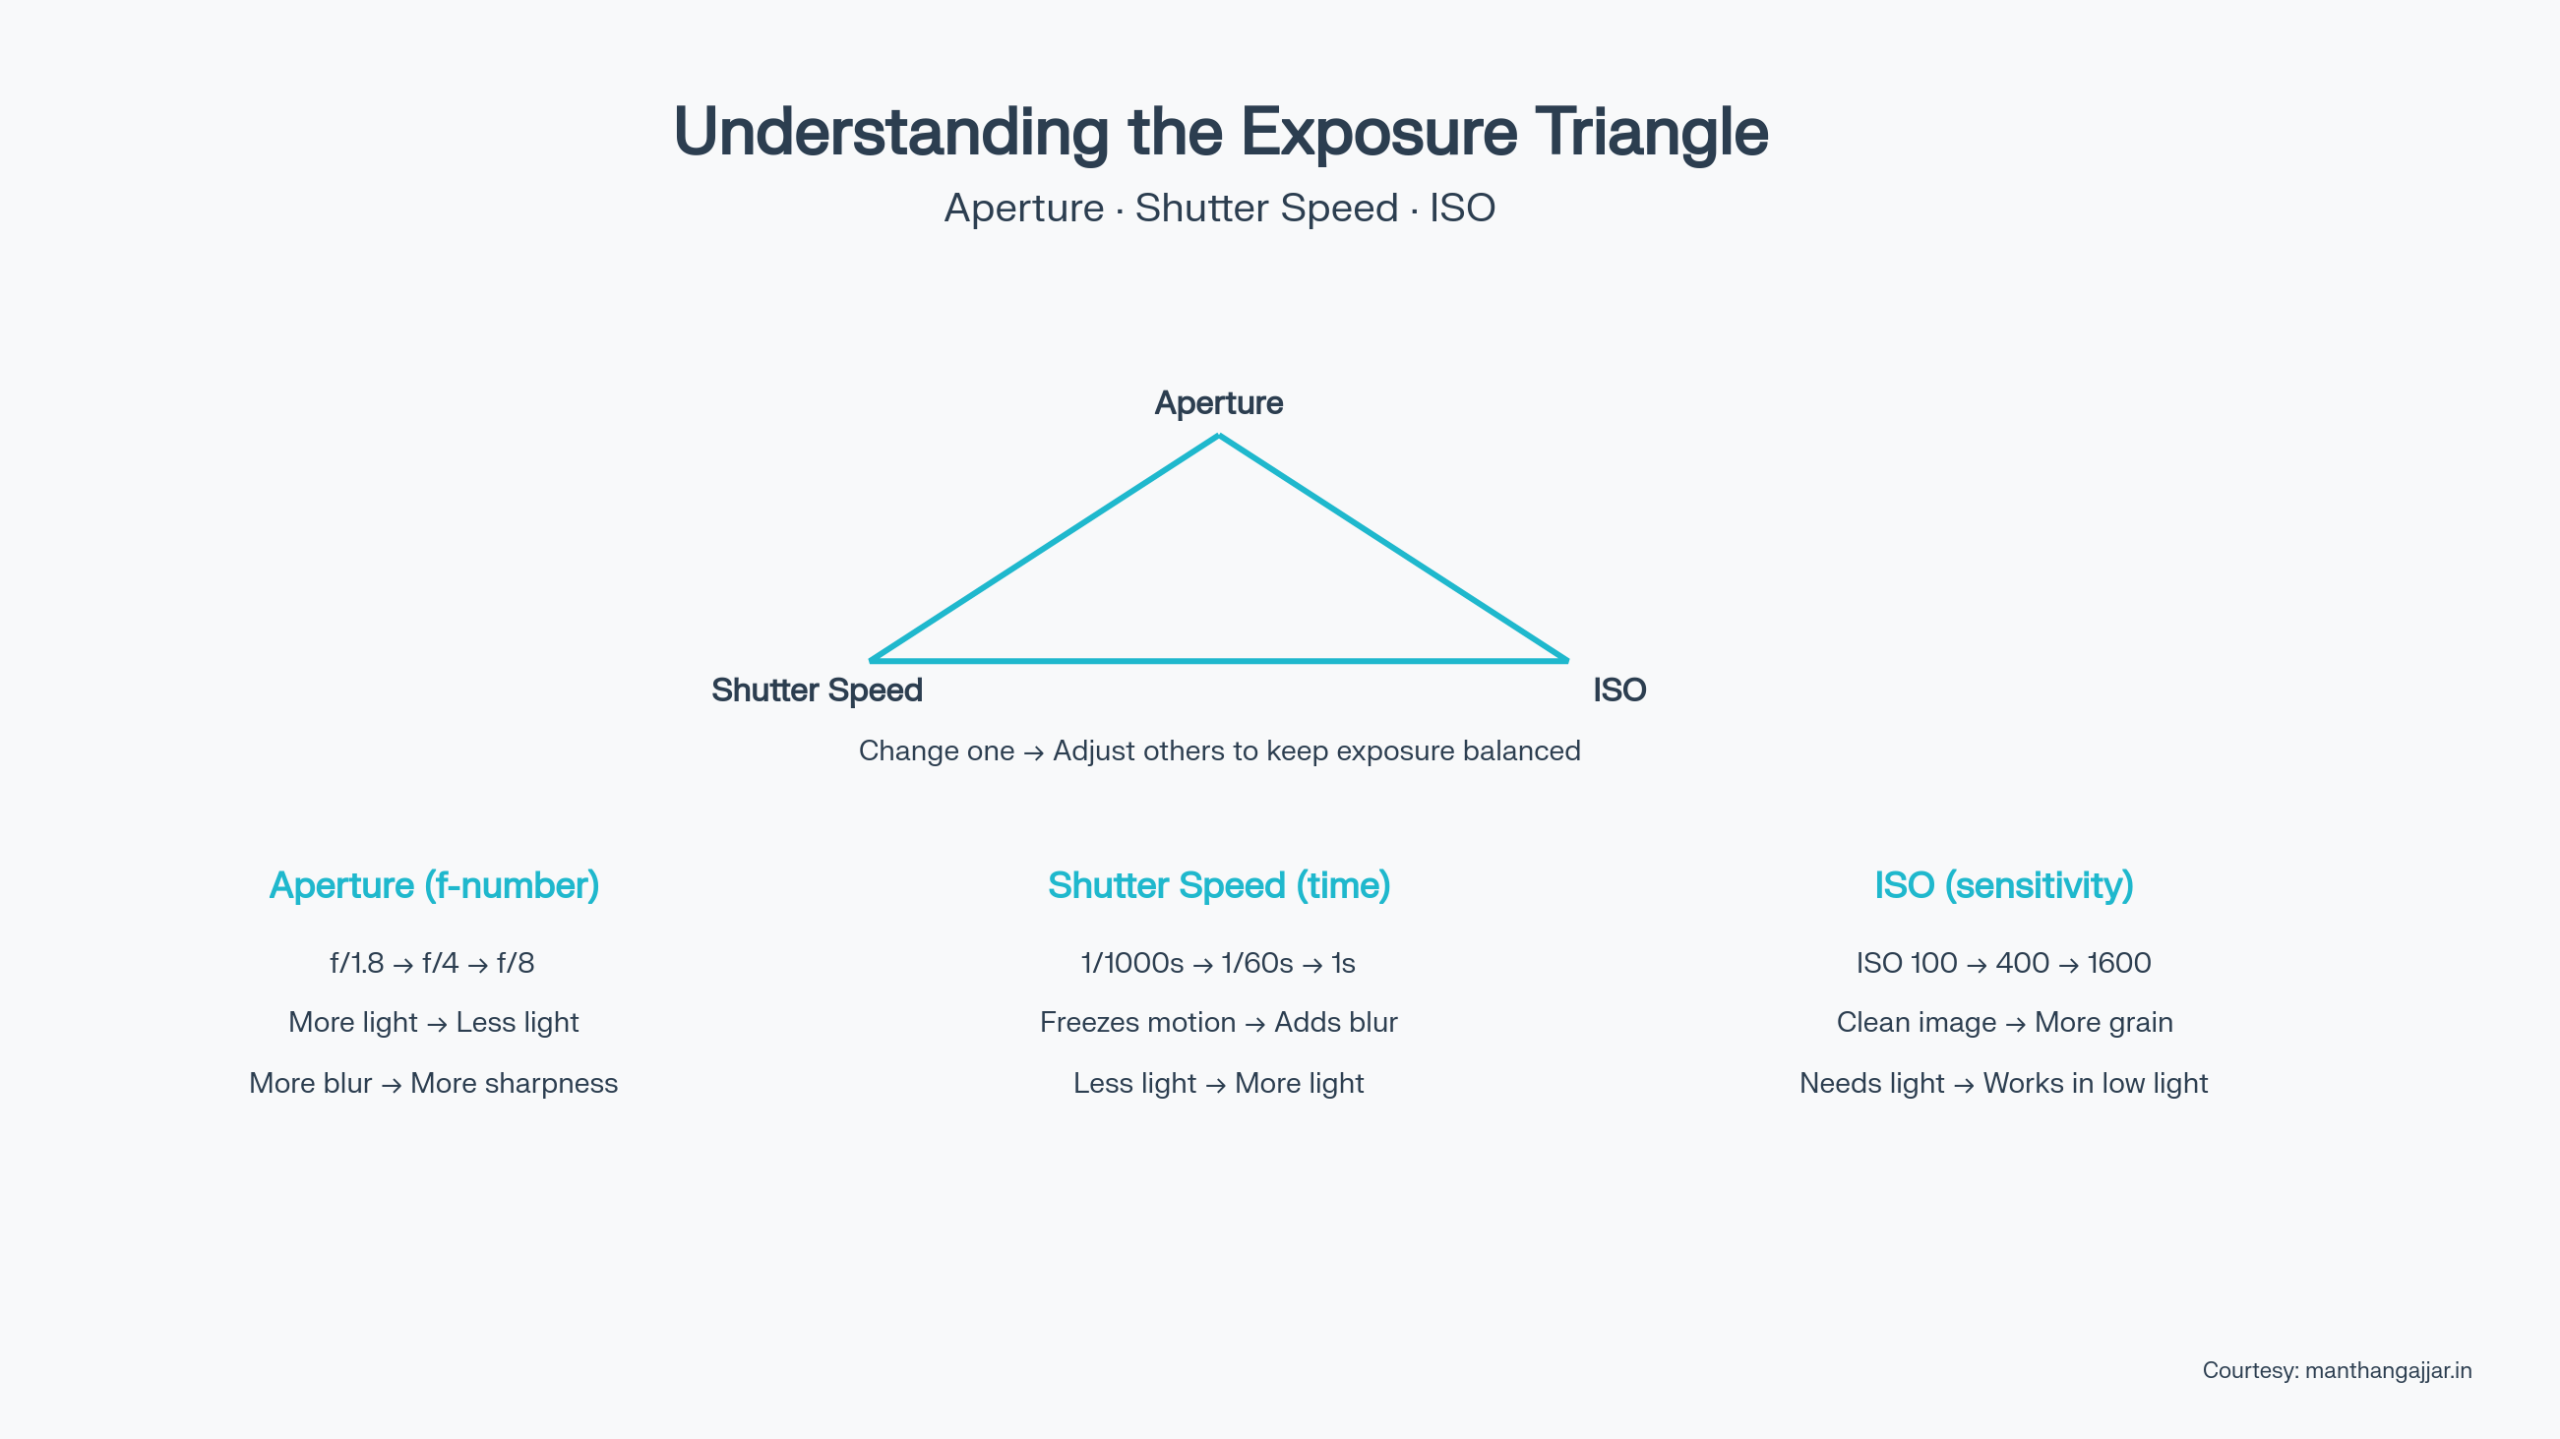
The exposure triangle is one of the techniques that is at the foundation of photography; it is one of the basic techniques that, as a beginner, you should learn first.
It can help you understand how your camera controls the light.
The thing that decides how much light enters the lens is the aperture; it can also have an impact on the brightness and the depth of field in your images.
A wider aperture can allow more light to enter the lens, which is ideal for portraits, as it can create a background blur.
A smaller or narrower aperture, on the other hand, allows less light to enter the lens, which is best for landscape shots as it keeps more of the scene in focus.
With aperture, the shutter speed is another factor that matters.
Master Shutter Speed
Shutter speed is basically how motion is captured by your camera.
A faster shutter speed works best for street scenes or action scenes, as it can freeze the motion in your images.
A slower shutter speed, on the other hand, can result in a motion blur, which works best for adding a sense of motion in your images.
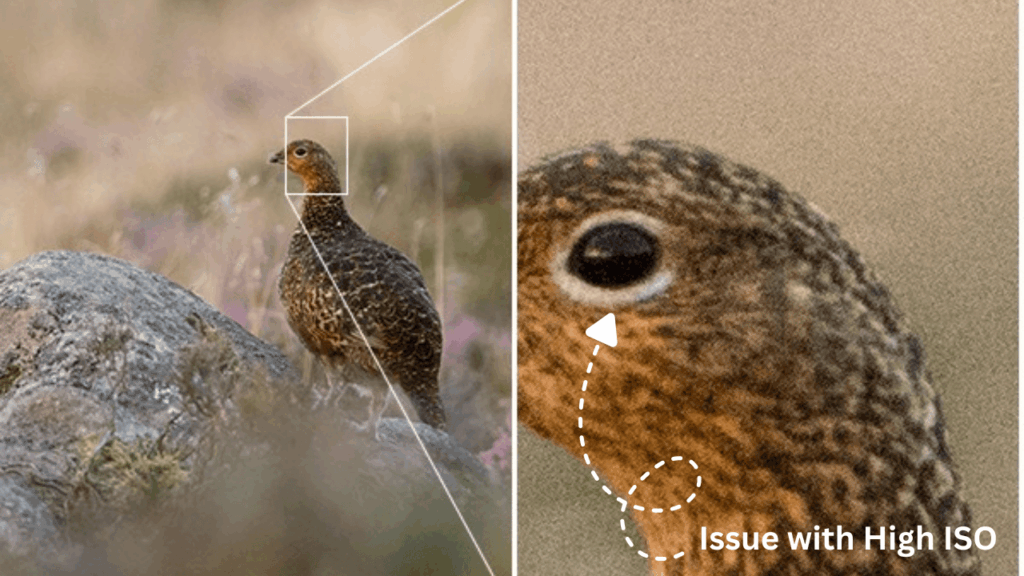
Now, another important factor is the ISO.
Let’s understand ISO
ISO settings can adjust how sensitive your camera is to the light.
Lower ISO works best as it can give cleaner images, but higher ISO can result in grainy images.
Higher ISO can help in low-light conditions, but it still introduces gain in your image.
You can decide the aperture, shutter speed, and ISO based on the situations you want to capture.
Photography Composition Rules: Framing & Depth Explained
Composition is the thing that provides structure to your images.
As the composition has such a huge impact on your image visuals hence it is important for you to understand the composition of your images and how to compose in the best possible way.
One of the techniques that is best for composition is the rule of thirds.
Master Rule of Third In Detail
The rule of thirds can help with the placement of your subject in your frame, such that it can make your image more balanced and natural, and even create a visual interest for the viewer in your work.
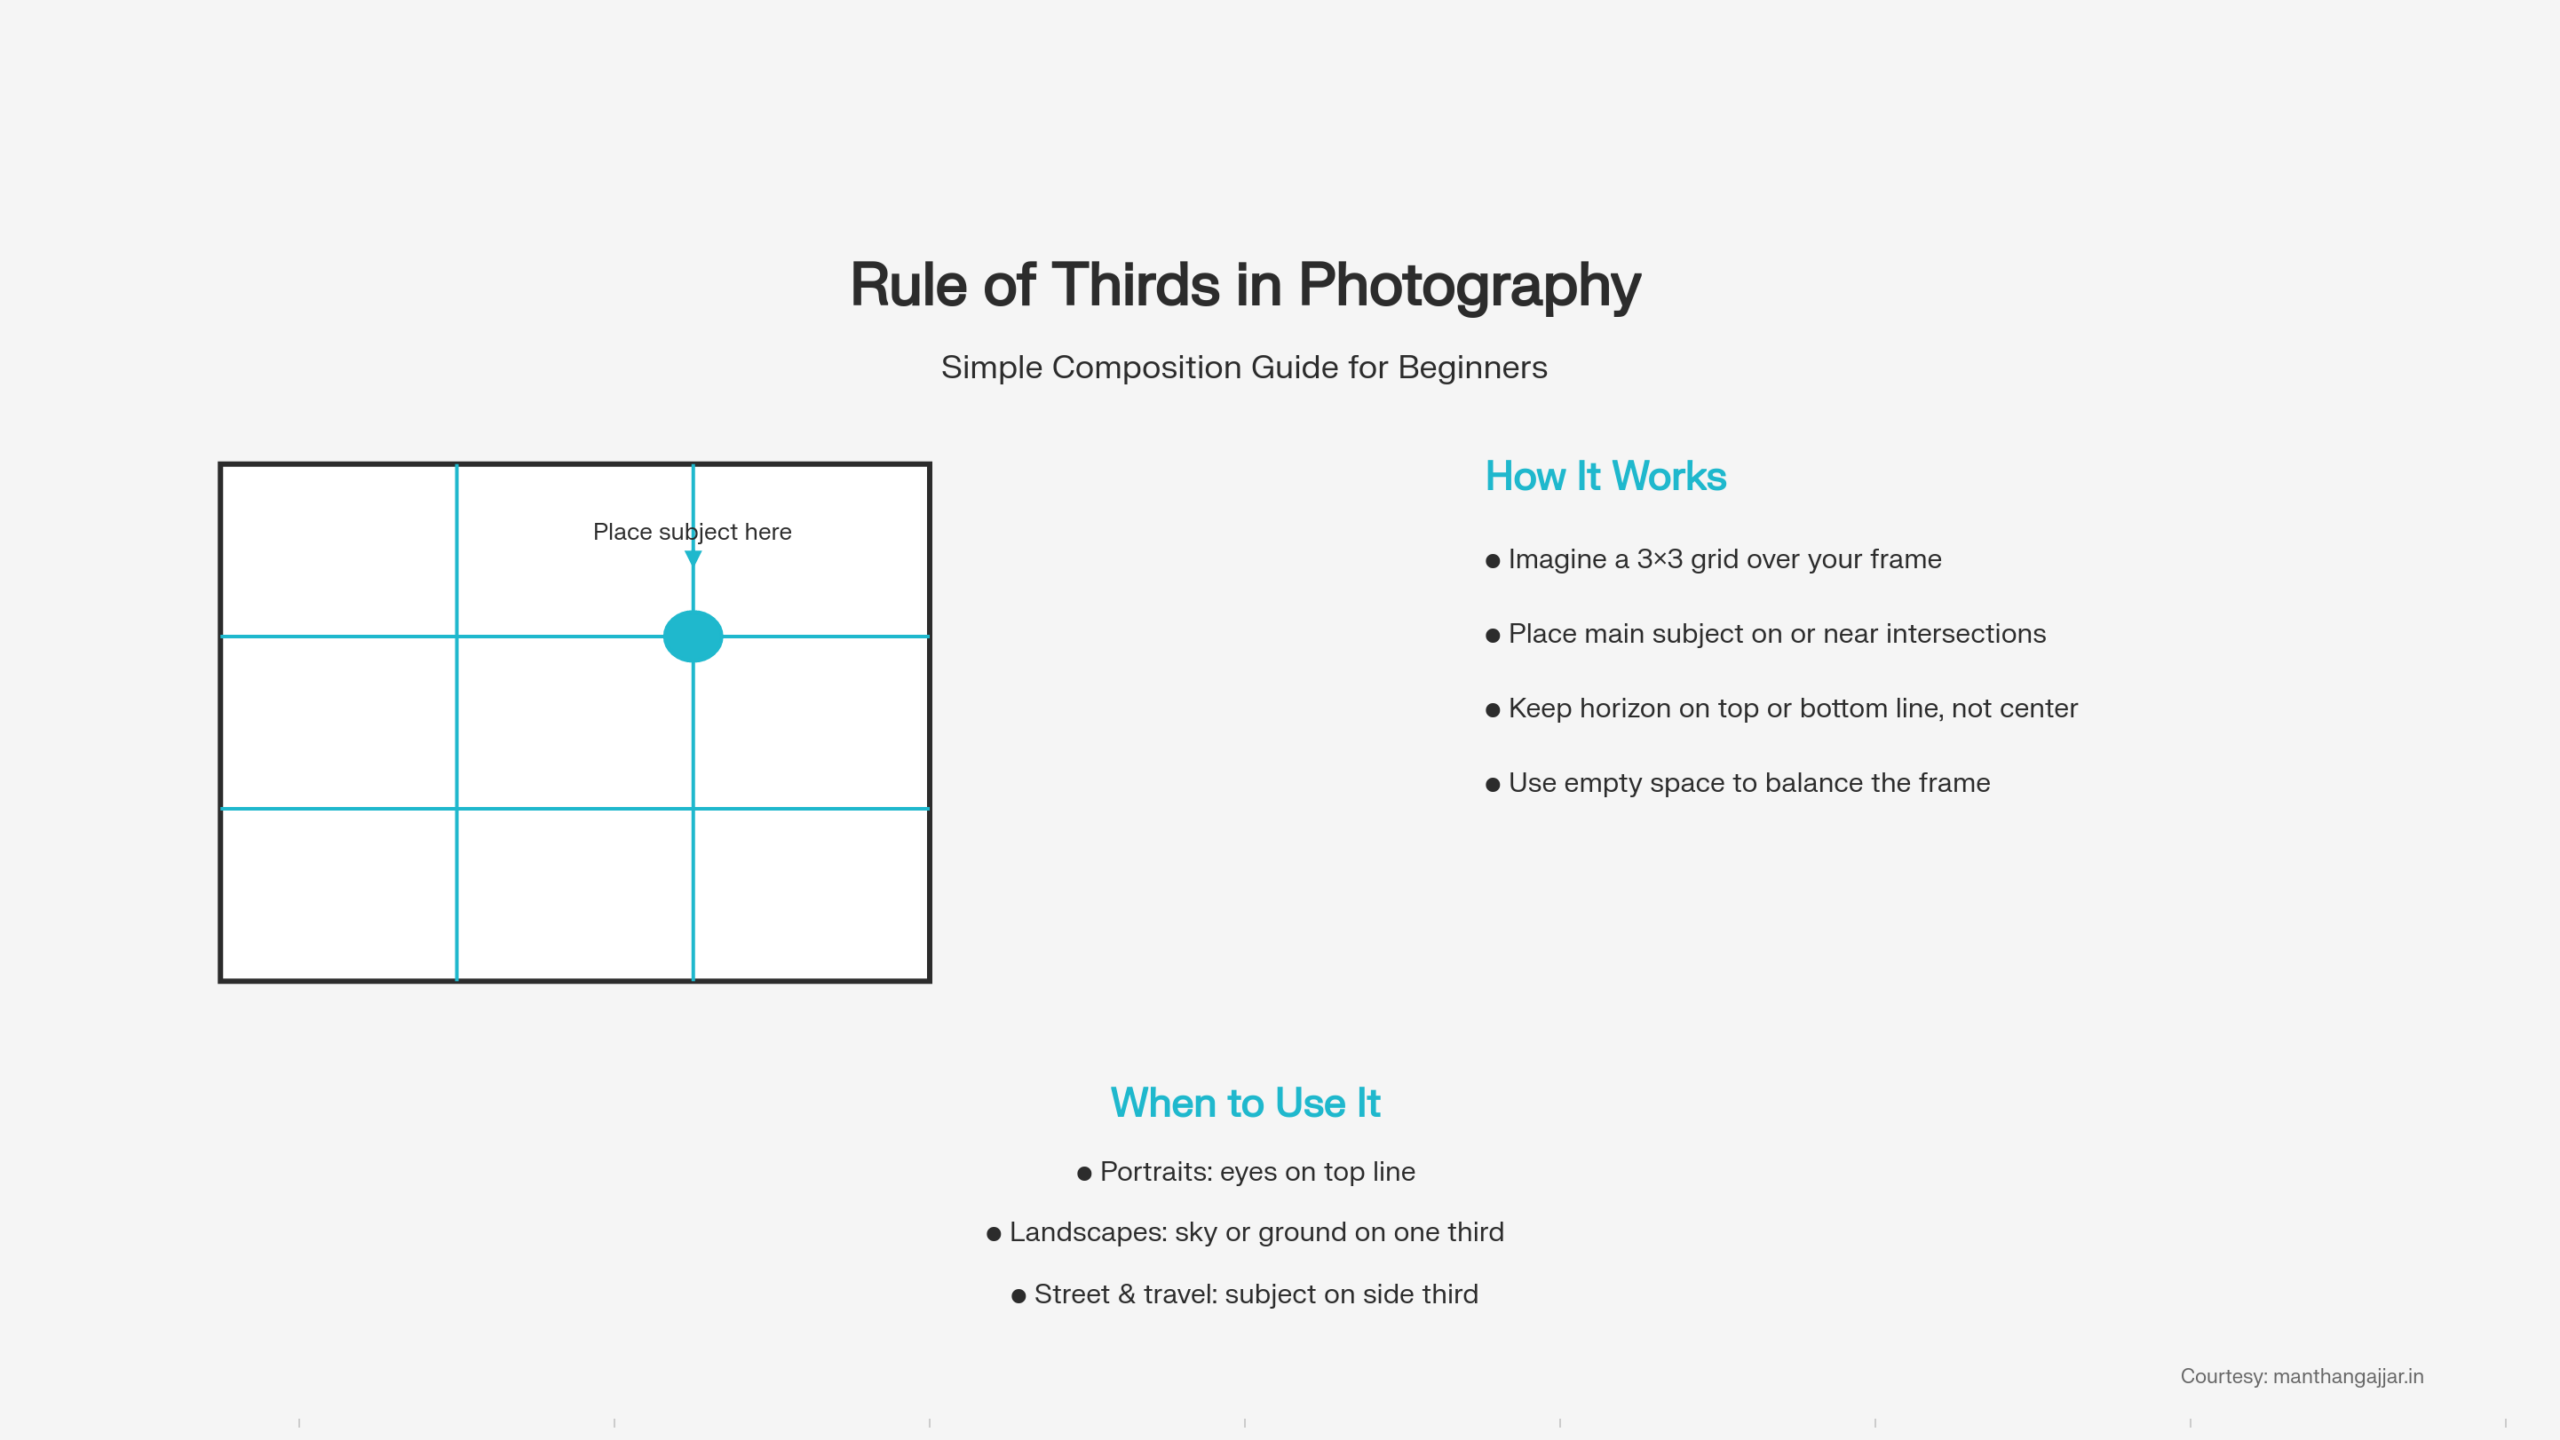
The rule of thirds can help guide the viewer smoothly throughout the frame.
This rule simply states that place your subject or the important elements in your image along the two horizontal and vertical lines or along the intersection.
But placing the subject at the exact centre is not advised.
You can even try placing the subject slightly to the right or left of the grid intersection.
More About Leading Lines
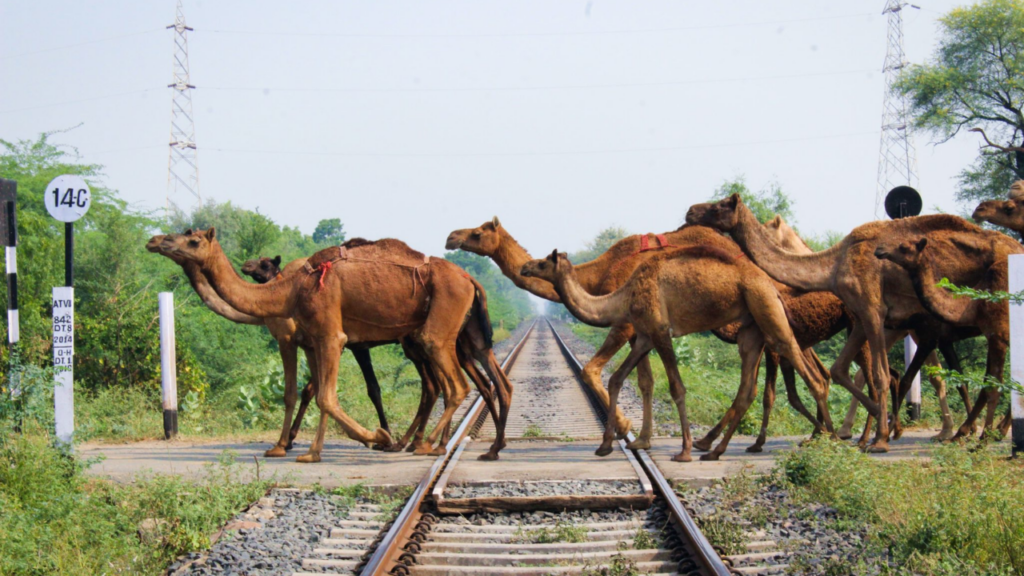
Leading lines are another important composition technique.
This is exactly as the name suggests, the leading lines mentioned can be natural or artificial that are present in the scene you want to capture.
Some examples of the roads, railway tracks, rivers, fences, walls, staircases, etc.
The theory behind this is that the human eye naturally follows lines.
Now, if the lines are arranged in a manner that they converge at a subject, it can create a visual path for the viewer.
These leading lines help with establishing the depth, perspective, and a sense of direction, and can make a 2-D image seem like a 3-D image.
The lines do not have to be straight; they can be diagonal, curved, etc, as long as they draw the attention towards the subject.
Diagonal and converging lines can add energy and drama in your images.
Leading lines combined with the rule of thirds can create engaging and almost professional-looking images.
You can learn more in-depth about Best Photo Composition Techniques in this article. it include more then 5 tested composition techniques with real life examples.
How to Frame Better Photographs: Essential Techniques
Along with the composition, framing also makes a difference in the output.
For framing, you can use windows, doors, or other natural elements that are available around you.
Framing can isolate the background and help you decrease the visual distractions and highlight the subject.
It can add a sense of depth and context to your image, making it look layered.
It is important to learn to simplify the background, change the angles by using the various techniques mentioned above.
You can explore some new techniques after mastering or learning about the techniques mentioned above.
Composition is all about the story that you are trying to tell.
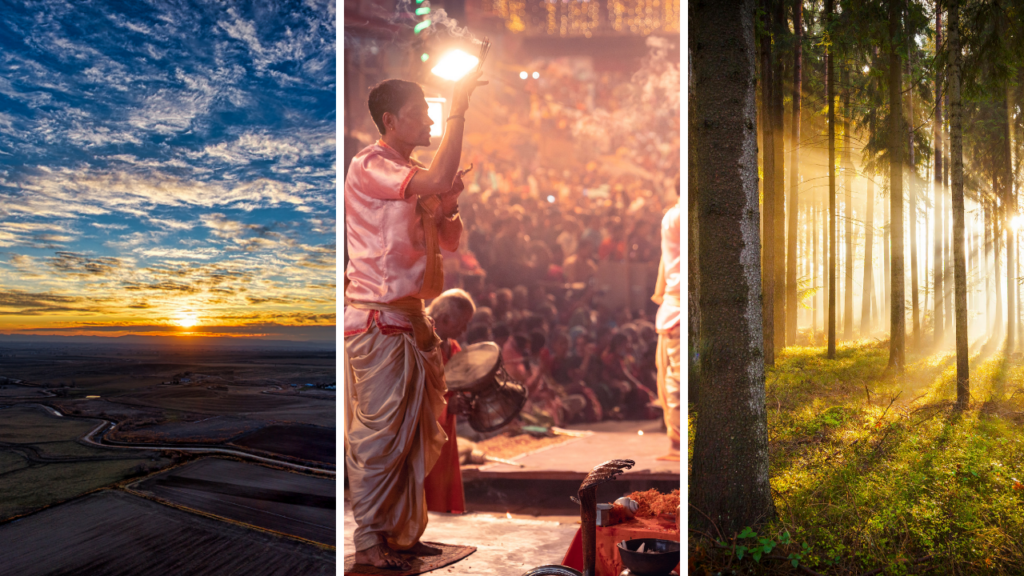
Camera Settings for Indian Conditions: Street, Portrait, Travel & Low-Light
Street Photography requires fast reaction time and faster shutter speeds to capture the fleeting moment cleanly.
In street photography, a faster shutter speed can keep the subject clear and help you freeze the spontaneous moments on the street.
Along with a faster shutter speed, a moderate aperture can help you maintain the depth of the field.
The combination of the right shutter speed and the right aperture can help you get the sharp street-style images.
Now, for the portrait photography, the wider aperture works best as it can isolate the subject from the background.
Using a wider aperture can even create a soft and pleasing background.
For travel photography, flexibility is required as the conditions keep changing for capturing as you travel.
While travelling, you might want to shoot different styles of photographs, such as landscape, architecture, people, food, etc.
So, in travel photography, you need to be aware of your surroundings and adjust according to the scene.
For low-light photography indoors, evening shoots, etc., you need to increase the ISO carefully and stabilize the camera.
In summary, it can be said that no matter the type of photography, understanding light and adjusting the settings can make quite a difference.
Checkout some of the Most Creative Indian Photographers To Follow On Instagram In 2026.
Building Your Photography Workflow: Shoot to Final Output
A good workflow is a structured and systematic approach that can help artists get the best results efficiently, consistently, and creatively.
It includes planning the whole process, defining the purpose of your work, what type of photography you want to do, location, timing, lighting conditions, props, etc.
You need to decide all the above things before you start the shoot.
The workflow even includes the post-production and editing phase.
Hence, we can say a smooth workflow is as important as gear or camera skills.
If you don’t have a well-defined system, some photos get lost, and editing can be messy, which can make the quality of the images suffer.
In India, there is unpredictable weather, and travel can also be unpredictable; hence, having a good system can be beneficial.
A good workflow makes the whole process a bit smoother.
Choosing Photo Editing Software: Best Tools for Beginners
Post-processing is the process that is an important part of a good workflow.
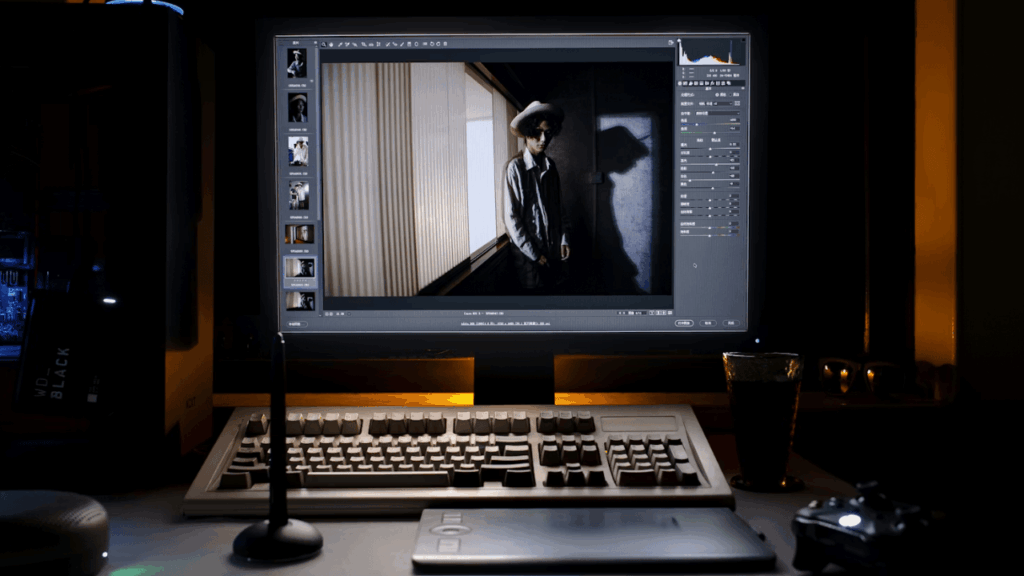
In the post-production process, the photos are refined and edited. This process makes your work presentable and ready to share with the world.
For this process, as beginners, you should choose the editing software that suits you and that you are comfortable with.
The editing software can offer you control over exposure, colour correction, and sharpness, which can allow you to learn.
Along with the software on the desktop, various mobile apps can be useful for making quick edits on the go.
However, one drawback is that you may need to stick to one software or app first, and then you can move on to the next after mastering it.
Familiarity with one software can help you maintain a consistent editing style in your work, which is valued in the photography community.
Photo Organization & Backup: Hard Drive vs Cloud Storage Comparison
Another aspect of planning and building a workflow is file management.
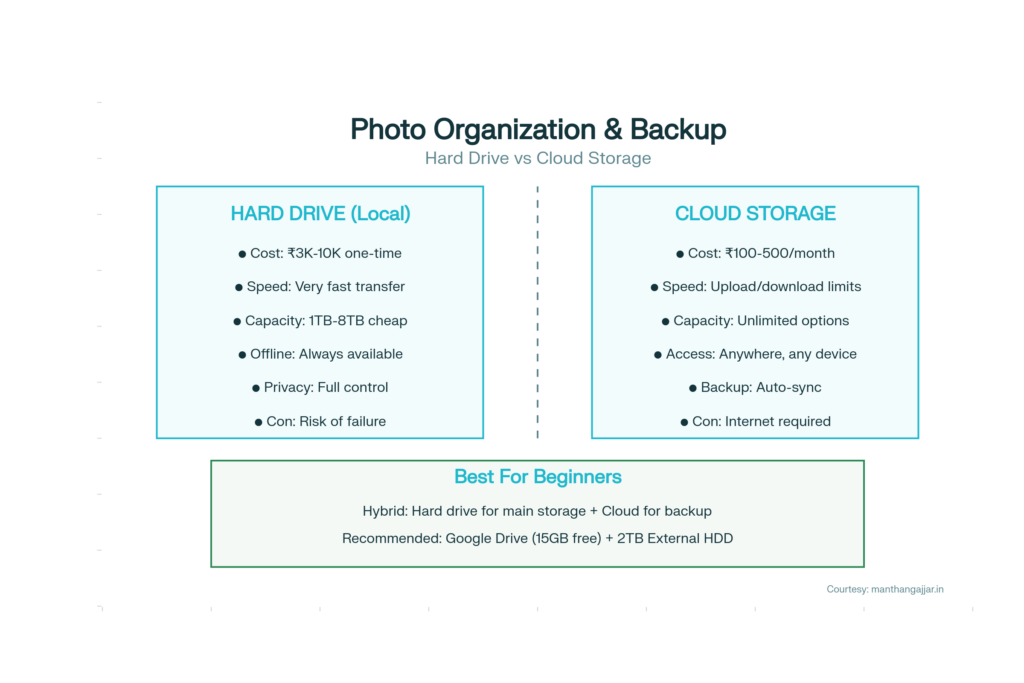
Good file management can help you preserve your work and keep it organized as well.
In order to keep your work organized, you can use the memory card to store the images in and organize them in various folders, however you see fit, whether it is based on date, location, project type, etc.
Even though you save your work in the memory cards, you should edit directly on the memory card, as they are only meant for temporary storage.
After editing, saving, and backing up images is an essential step.
You should ensure that you have one saved up on a hard drive or an SSD and another on the cloud, so that you have multiple copies of an image and there is security.
Planning Your Photography Shoots: Gear Checklist, Location & Weather
Planning the shoots and every step beforehand can give you an advantage, and it makes you ready for almost all the situations that you might face.
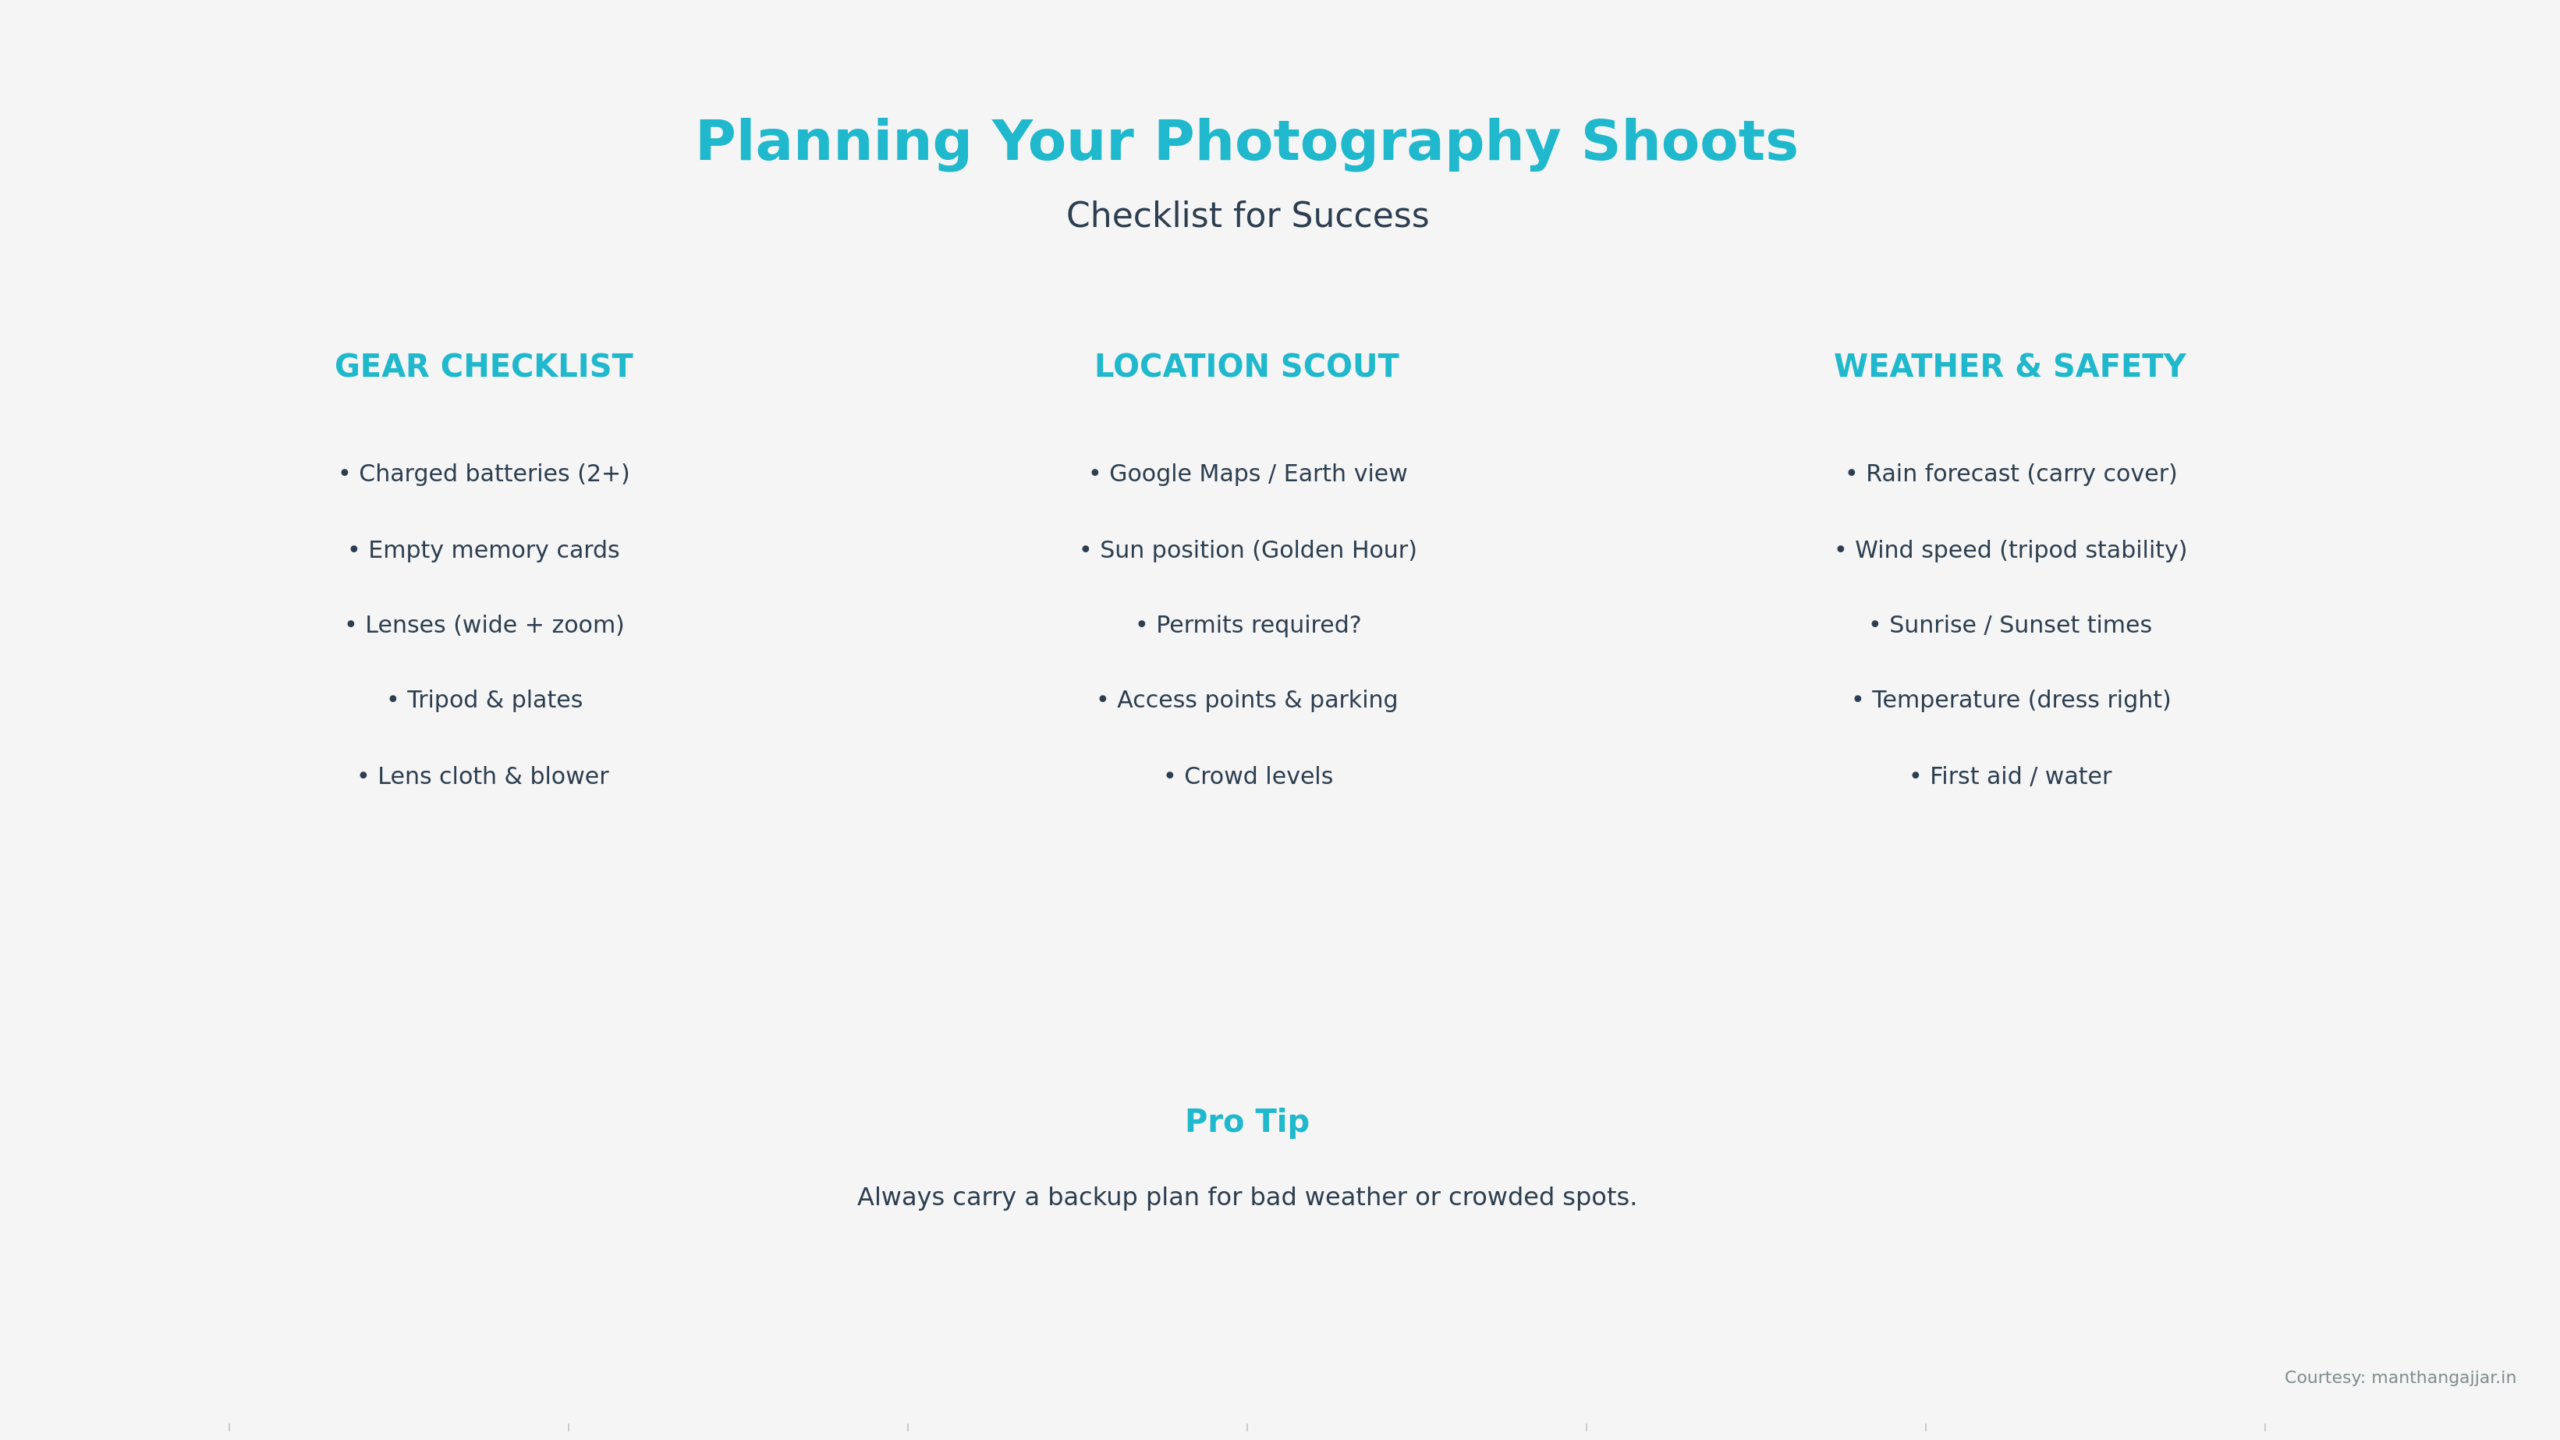
In the planning process, it is important and beneficial to just make a checklist of all the stuff.
The checklist can include the items that you should keep in your bag, such as batteries, lenses, memory cards, and other accessories etc.
You can make a checklist of almost anything that you want to such as the things that you need in your location, etc.
With the checklists, you make it easier to manage stuff and keep in mind every factor, and consider them while making a decision.
With effective planning and all the lists, it can reduce the stress and have a positive impact on the results, and also see improvement.
For careful planning, you need to take into account every factor, ranging from environmental, travel time, weather, etc.
Upgrading Your Photography Setup: When & What to Invest Next?
After shooting for a long time with the same camera and gear, you will see that there is consistency in your images, and you will notice there are some limitations as well.
Now, there is always a right time for things; in the same way, there is the right time for an upgrade as well.
If the upgrade happens too fast or early, it can be considered overspending, and it could get confusing to understand all the new and advanced features of the gear.
If the upgrade happens too late, it can have an impact on the creative growth of the artist.
The main goal is to understand the right time to upgrade.
This is when you start to get bored with your gear, or your camera can no longer support the features you want, and can not create images as you want.
After the upgrade, you can learn all the advanced features of the new gear and create images that have improved image quality.
Which Should You Upgrade First: Lens, Tripod, Lighting or Camera Body?
Upgrading lenses is the one that is the most obvious change and the most valuable one.
The criteria to know when to upgrade your lenses are when you start to notice that your images lack sharpness, you struggle in low light, the separation of the background and the subject becomes hard, etc.
Upgrading the lenses can have a huge impact on the results.
A tripod is another necessity in photography, which offers stability to your work.
At the start, you can get a cheaper tripod, but if you are up for an upgrade, then you should buy a solid one that can offer you new possibilities with various angles, etc.
Upgrading lighting is the easiest, You can use controlled lighting when natural light is not enough.
Controlled lighting can be used in portraits, products, indoor photography, etc.
Lastly, a camera body should only be upgraded if there is a requirement for that, which is only when your camera limits the autofocus, dynamic range, and other features as well.
Upgrade Path by Photography Style: Street, Portrait, Travel, Landscape & Studio
Upgrades depend on the style of photography you prefer as well.
In case you of street photography, the upgrades can include the lightweight camera bodies, compact lenses, and fast autofocus.
For portrait photographers, you could consider lighting upgrades for the skin tones and the depth of field.
The best upgrades for travel photographers are durable bodies, compact accessories, etc.
Landscape photographers can benefit the most from wide-angle lenses, filters, and sturdy tripods.
Now, lastly, for studio photographers, the best upgrades include the lighting equipment, modifiers, etc.
Photography Setup FAQs: Questions Every Beginner Photographer Asks
Some of the most asked questions about the photography setup are answered below.
Do You Really Need Expensive Gear to Take Great Photos?
No, you don’t need any expensive gear to start good photography.
Photography nowadays can be done with a smartphone. The only things that matter for good photography are the light, composition, and the story your work tells.
Hence, you can start with a smartphone or any other entry-level camera.
You can check out our latest guide on Best Camera Phones for Photography in India 2026 & Camera vs Smartphone Photography: Buyer’s Guide for India 2026.
Can You Start Photography with Just a Smartphone?
Yes, smartphones are sufficient to start with photography in India.
You can learn the basics of photography, which can provide beginners with an artistic eye, understand timing, framing, etc.
Learning photography with a smartphone can help you with the knowledge and experience for professional cameras.
But smartphones have drawbacks too, some of which are difficulty in low-light conditions, and also, the creative control is less in smartphones.
How Indian Climate (Dust, Humidity, Monsoon) Affects Your Photography Gear?
The climate, especially in India, is uncertain and keeps changing.
It also plays an important role in the care of your lenses or other photographic gear.
The dust can enter the lenses and cameras, and the moisture in the monsoon can have an impact on electronics.
You can even use the rain covers in the monsoon as well.
You can create a basic care plan for your equipment, and some extra seasonal care can protect your gear and make it long-lasting.
Start Your Photography Journey: Action Plan for Beginners
For a beginner to start their photography journey, all you need is curiosity, the will to learn, and consistency.
You can play smart by choosing the practical equipment; the gear does not have to be high-end and expensive.
You can start by learning the basics, establishing the workflow, and sharpening your eye to move forward and start your journey.
As you keep going and start shooting consistently, you will start to notice what you want, which helps you get a better understanding of the camera and the various settings and how these impact your work.
Regular practice and consistency can have a much powerful impact than theory can teach a photographer.
With every picture you take, you understand something about editing, settings, composition, framing, etc.
And with every lesson, you take a step towards figuring out the style you want in your images.
You can make various upgrades at different points in time and grow your photography journey.
For upgrading, you need to do so with a purpose set in mind.
A good workflow can also make photography enjoyable as well as efficient, rather than feeling like a job.
With the planning, you can get the best results possible most efficiently.
But most of all, the thing that matters the most is that you enjoy yourself in the process of creating images.