In today’s world, storytelling is not only about words, it’s about movement, emotion, and perspective.
No matter if you’re creating travel vlogs or social media reels just for fun, shaky footage can distract and pull viewers away.
That’s where a smartphone gimbal steps in. Gimbal can transform ordinary clips into cinematic experiences.
Smartphone Gimbals matter because they let you visually connect with your audience on a deeper level.
So because of Gimbals, the kind of visual you’ll get, that’ll increase engagement & even your content’s value.
In this ultimate how-to guide on using a smartphone gimbal, I’m sharing key gimbal techniques and smartphone gimbal tips that you can use with any mode.
We’ll explore smooth movement, like how to walk, how to use your knees, and what the benefits are if you keep the gimbal close to your body while using it.
These tips will dramatically reduce shakiness and help you capture some cinematic footage.
Whether you’re a beginner vlogger or seasoned visual creator, this guide helps you to use any smartphone gimbal to its full power.
After reading this article on Smartphone Gimbal Tips, you’ll walk away shooting smoother, storytelling with impact, and you’ll get enough confidence to create a cinematic masterpiece.
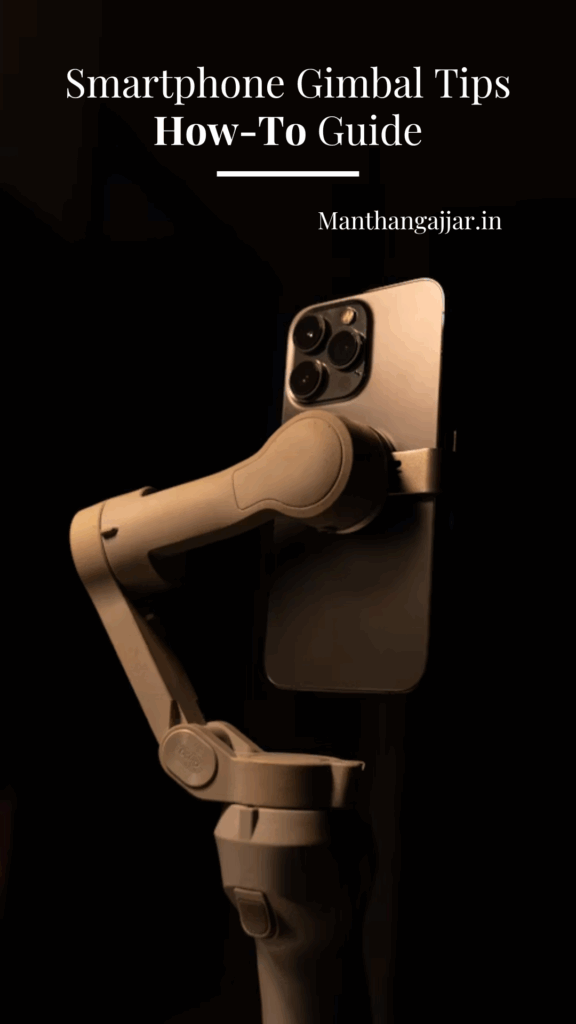
Smartphone Gimbal Tips: Essential Techniques Every Mobile Filmmaker Needs
Now let’s jump into the real content to master Gimbal like a pro.
Proper Balancing & Setup
This is the very first and very important smartphone gimbal hack from my understanding.
Getting your smartphone properly balanced on the gimbal is the foundation for smooth and steady footage.
Start by mounting your phone horizontally by attaching the needed accessories.

Make sure the phone floats level without tipping or drifting.
If the gimbal stays stable in place even when turned off, that’s the sign that you’ve nailed the balance. (Good work!)
Now, to stop the wobble effect, make sure you tighten all adjustment knobs securely and make sure your phone clamp is snug to avoid shaky footage.
These are pretty simple but very important steps many newbies overlook.
You can always adjust motor strength and smoothness settings to reduce jitter. This stuff can happen when you use lighter smartphones.
Walking & Panning with Stability
You got the gimbal and a perfect smartphone, but you can’t shoot by standing still, you need to move out.
So, one of the most important techniques for using a smartphone gimbal is learning how to walk and pan with stability.
Even though the gimbal stabilizes your phone, your movement still plays a big role in how smooth your footage looks.
This is where the “Ninja Walk” comes in, it’s a slow, controlled walk where you keep your knees slightly bent and your steps soft.

So now, instead of lifting your feet, you need to glide forward heel-to-toe to avoid any vertical shake.
During this walk, make sure you keep the gimbal close to your body and your arms relaxed for better balance.
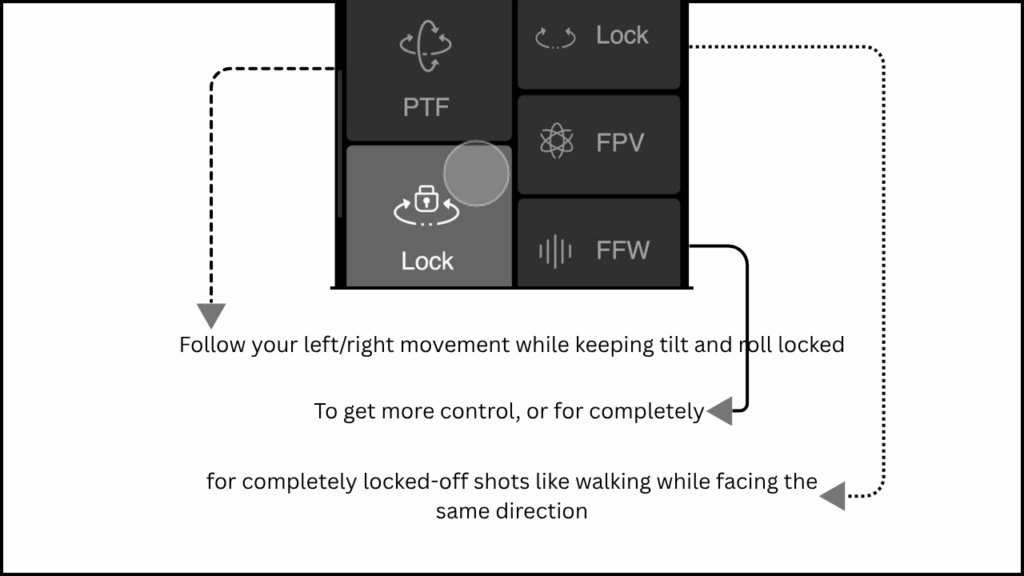
When it comes to panning, you can use the built-in gimbal mode if available.
Many videographer uses Pan Follow (PF) mode to follow your left/right movement while keeping tilt and roll locked. It gives a graceful motion.
You can also use Follow (F) mode to get more control, or for completely locked-off shots like walking while facing the same direction, use Lock (L) mode.
With a steady walk and the right mode, even simple movements can feel cinematic.
Subject Tracking
Subject Tracking is one of the most important features a smartphone gimbal can offer.
If you’re a solo creator or like to show dynamic scenes, this important gimbal feature you must need to master.
Under the hood, subject tracking helps your gimbal’s to automatically follow a subject.
The subject can be anything, like a face or any object, as it moves through the frame.
For example, if you want to track someone’s face, then you need to lock the subject (here we have someone’s face as a subject), and that’s it.
Your gimbal now follows that subject and makes that in focus every single time.
There are two main ways to use subject tracking.
One is manually tracking, where you physically follow the subject with smooth gimbal movement, using your body and controls to keep your subject in center or in focus.
On the other hand, many smartphone gimbals offer built-in Tracking features via their app (like DJI).
So you just need to tap to select your subject, and boom.
Once you’ve done that, your gimbal’s motorized head will automatically follow their movements, and keep the frame tight and consistent.
No matter if you’re shooting horizontal or vertical, or even both.
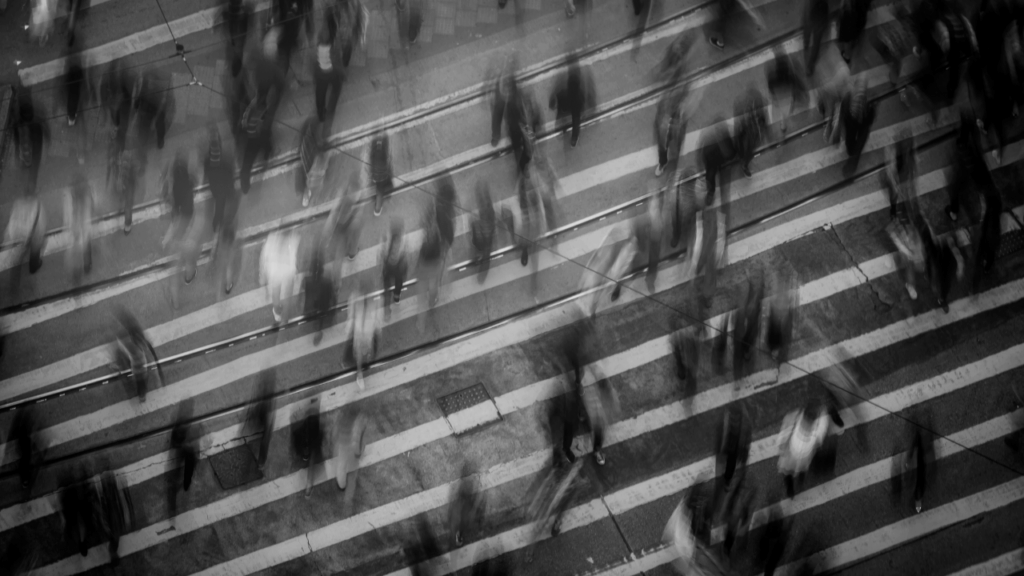
Time-Lapse & Hyperlapse
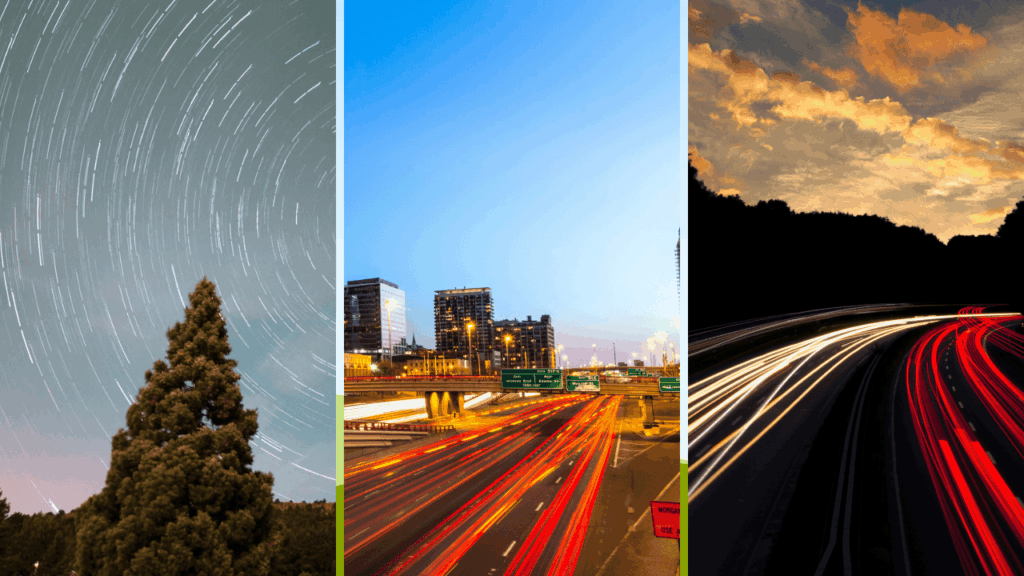
Time-lapse and hyperlapse videos are two very creative techniques that add a pretty amazing cinematic touch to your storytelling.
And a smartphone gimbal makes them quite easy and smoother than ever.
A time-lapse captures still frames at set intervals and combines them into a video that plays back at high speed.
Ever watch some 15 sec video of sunset or shifting clouds? Those are called Time-lapse videos.
A Hyperlapse is a type of time-lapse where the camera physically moves.
The camera can move forward, sideways, or around a subject while recording. That’s up to you.
This dynamic motion creates a more engaging experience.
How to shoot a Motion Time-lapse with A Smartphone Gimbal?
For that, start by placing your phone on a tripod or flat surface.
Open your gimbal’s ready-to-go application (like for DJI, it’s DJI Mimo) and switch to the time-lapse mode.
Most of the apps allow you to define keyframes or motion paths, so you can easily move your camera left to right or even upward slowly.
Set the interval and duration. An interval of 2-5 seconds between shots is ideal, and you can decide the duration as per your need.
Shoot Hyperlapse with your Smartphone Gimbal
For Hyperlapse, you’ll be moving the gimbal yourself.
Majorly, while walking forward or circling a subject.
Use the Ninja Walk technique to avoid jitter.
You can shoot at higher frame rates, like 30fps, for smoother hyperlapse.
And make sure you stabilize your movement with wide-angle shots, so you can keep the subject in the center for a better outcome.
Creative Angles & Transitions
If you’re an artist, then I’m assuming you’re already aware of these smartphone gimbal tips.

If we talk about creative angles, then there’s one powerful technique is ground-level tracing.
Position the gimbal close to the floor and follow your subject’s movement.
This angle adds drama. In simple words, it makes raw movements feel more cinematic.
Like a slow reveal of footsteps walking toward the camera.
Reveal transitions are another fun and engaging trick (make sure you add good sound while processing!).
For example, start your shot behind an object like a wall, then slowly move the gimbal sideways to reveal your subject.
This kind of transition adds curiosity, it’s useful when switching scenes or adding new elements in your video.
These angles and transitions work beautifully in travel vlogs, short films, or even everyday reels.
If you do it right, they can convert your boring footage into something thoughtful, crafted visual narratives.
I know, it took some time for me too, to master this art. All you can do is practice.
Make sure you enhance your art with purpose and creativity.
Bonus Smartphone Gimbal Tips
To get the most out of your smartphone gimbal, you need to think beyond stable footage.
As an artist, you can do that, right? And it’s awesome if you just capture something unique of your own and show it to the world.
One highly underrated addition is a small fill light, especially useful when filming in low light or indoors.
As you know, many new gimbals now come with cold shoe mounts, so you can easily attach an LED light that helps illuminate your subject evenly.
Same way, if you’re shooting interviews or vlogs, an external microphone is a must.
So you can boost your audio clarity compared to your phone’s built-in mic.
Other accessories, like a mini tripod or extension rod, can take your shooting quality further.
As you know tripod can bring more stability, and an extension rod can help you achieve high-angle or selfie kind of shots without losing stability.
Lastly, make sure you do maintenance and firmware updates as soon as you get them.
Keep your gimbal clean and charged so you can use it whenever required.
FAQs (FAQ schema)
Now let’s talk about some FAQ(s) about Smartphone gimbals…
How do I properly balance a gimbal?
The quickest way is to place your phone horizontally in the clamp and adjust the arms until your device stays level without tipping to one side.
Make sure your phone remains steady even when the gimbal is turned of,f as mentioned earlier.
What gimbal shooting mode is best for walking?
For most walking shots, use Pan Follow (PF) Mode. So you can shoot horizontal footage while keeping the tilt stable.
For more cinematic control, try Follow (F) mode to include tilt motion.
Make sure you follow the mentioned techniques, like the ninja walk.
Can I use a smartphone gimbal with a vlog?
Hell yes! Gimbals are perfect for vloggers because it keeps your footage smooth and professional.
How do I clean or maintain my gimbal?
Use a microfiber cloth to wipe down the gimbal and remove dust particles from motors and joints.
Don’t use water or harsh cleaners, and make sure you store your gimbal in a dry case or pouch to prevent any damage.
Conclusion
Remember, smartphone gimbals are more than just a tool to avoid shaky footage. It can help you create better storytelling visuals.
From Smooth cinematic walks to creative transitions and motion time-lapses.
After reading & mastering all these Smartphone Gimbal Tips, your gimbal opens up endless possibilities for you to create professional-looking videos with just your smartphone.
The key is to practice regularly, as I mentioned earlier.
If you’re new to this, then start with basic balancing and walking techniques, then slowly explore more advanced modes and creative shots.
Check out my full comparison guide on Gimbal Guru: A Comprehensive Review of the Best Gimbals | 2025 to pick the right gimbal for yourself.
Or even if you’re just looking for a DJI in-budget gimbal, then check out my blog on Top 5 DJI gimbals To Buy under 20K.
Whether you’re vlogging or capturing family moments, these gimbal tips will help you film like a pro, without carrying bulky gear.
Keep exploring, keep shooting!
Read more
- Ways To Earn Money From YouTube In India | Under 6 Months*
- 28+ Best Indian Influencer Marketing Platforms For Content Creators
- Popular And In-Demand Photography Types To Master TODAY | With Examples*
- Mobile Masterpieces | 11 Photo Editing Apps for Android To TRY
- 49+ Self-Photography Quotes That Celebrate Growth & Solitude